Colorado Trail Thru-hiking and Backpacking Guide
a 485 mile trail along the Continental Divide through the Rocky Mountains
July 27th, 2023
Mile for mile, the Colorado Trail is hard to beat for its alpine views, lush meadows, and high-elevation singletrack. This trail crosses six wilderness areas and six national forests through several Rocky Mountain ranges.
I first thru-hiked the entire Colorado Trail in 2017, then again in 2020, and in 2021 I hiked it again as a part of the Continental Divide Trail. I even bikepacked the trail in 2015. This is everything I learned that you should know to plan for a backpacking trip on the Colorado Trail.
The Colorado Trail is a 485-mile hiking trail that crosses Colorado, from Denver to Durango, crossing the indigenous lands of the Ute, Apache, Arapaho, Cheyenne, Pueblo, Shoshone, and Ute people.
You can camp almost anywhere along the entire trail and won’t need to get any permits ahead of time to do so. And you’ll certainly find some epic campsites along the way. The majority of the trail is smooth, well-maintained singletrack, but it’s also pretty rugged in certain sections.
Distance: 485 miles
Days: 20-40
Elevation gain/loss: 89,000 feet
Best season: Summer or early fall
Permits: Wilderness self-registration only
Difficulty: Challenging
We create reader-supported, objective gear reviews independently selected by our editors. This story may contain affiliate links, which help fund our website. When you click on the links to purchase gear, we may get a commission — without costing you an extra cent. Thank you for supporting our work and mission of outdoor coverage for every body! Learn more.

The author at the Colorado Trail Waterton Canyon trailhead near Denver, Colorado.
The Colorado Trail Backpacking Guide
Most people take between four to six weeks to backpack the Colorado Trail. There are ample resupply options and places to stay along the trail, though many are in small, touristy mountain towns that require hitchhiking to access. Since there are plenty of places to resupply, most hikers never have to carry more than five days’ worth of food on the Colorado Trail.


The Colorado Trail has great high-alpine views on well-maintained trail for a great first-time thru-hike or super fun shorter thru-hike for experienced backpackers.
Highs
Great high-alpine views
Well-maintained trail
Views in the San Juan Mountains
Plenty of camping
Many resupply options
Great distance for a long trail experience. It isn't as long as the Pacific Crest Trail or Appalachian Trail but is longer than the John Muir Trail

Parts of the Colorado Trail can be rocky and are high altitude.
Challenges
Some long water carries
Less oxygen at high elevation. Plan for a few days to acclimate if you're coming from lower elevations.
Hiking above treeline for long stretches and planning for safety with afternoon thunderstorms
Summer storms
Lots of climbing

August and September is the best time to thru-hike the Colorado Trail. It’ll be chilly (but not too cold) in the morning and evening with mostly moderate temperatures throughout the day.
Best Season
The Colorado Trail is best hiked in the summer, especially during August and early September. Later in the summer is best since summer monsoon storms are frequent during June and July. And you’re more likely to encounter snowstorms in late September.
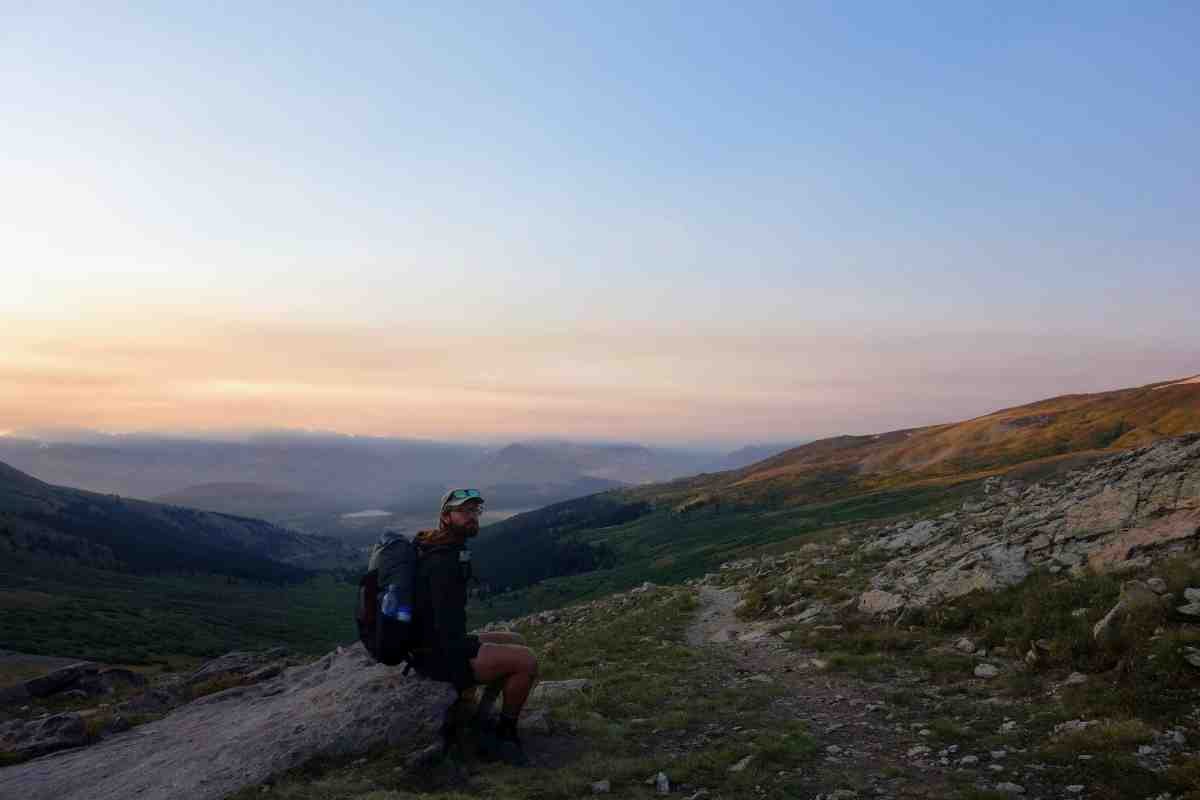
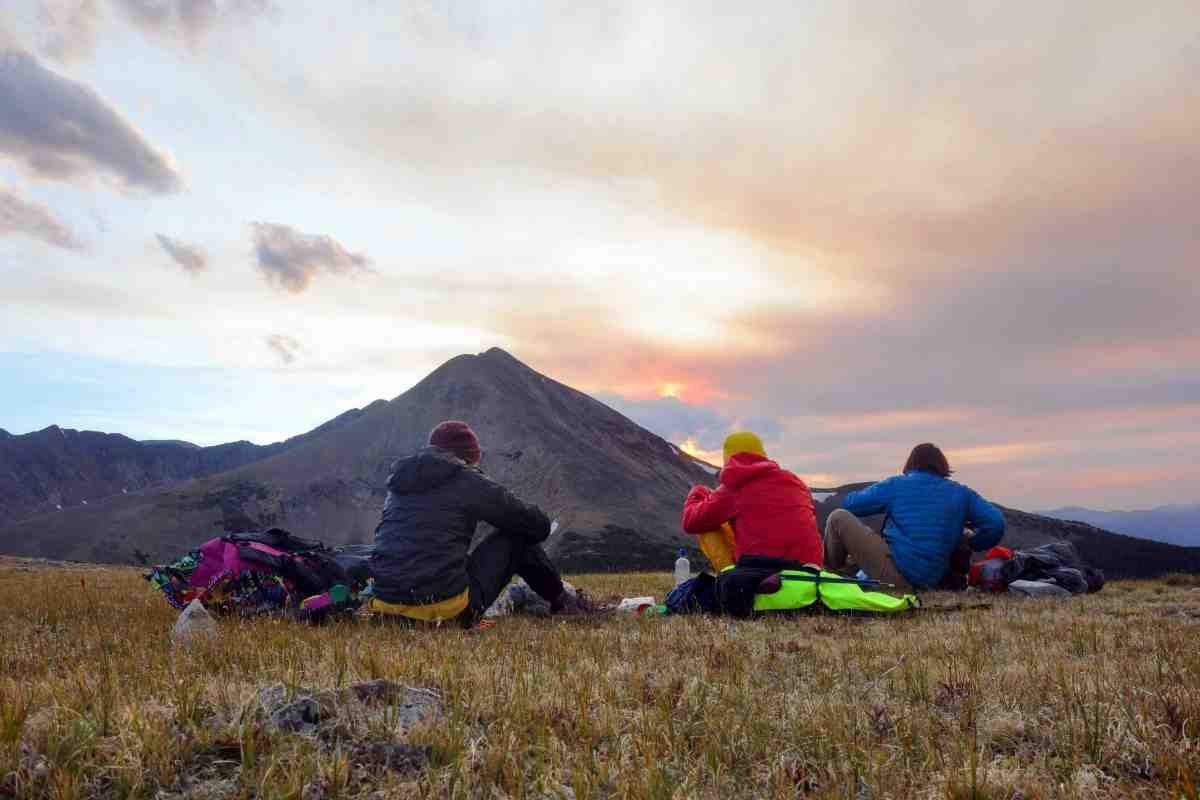
The author at sunset on the Colorado Trail.
Difficulty and Skills
Along with the Tahoe Rim Trail, John Muir Trail, and Long Trail in Vermont, the Colorado Trail is one of the easiest long trails for first-time thru-hikers to take on due to relatively easy navigation, resupply information, and length.
Navigation
The Colorado Trail is marked with the Colorado Trail blaze throughout most of the trail, which makes it very easy to navigate. The trail is well maintained, so following the most well-trodden path will usually take you in the right direction. There are some rugged sections where I’ve missed a turn, but with a GPS-enabled smartphone, and especially with modern phone apps like FarOut app or Gaia GPS, it’s relatively easy to navigate the Colorado Trail.
I only used the Colorado Trail Databook when I thru-hiked the Colorado Trail for the first time. On my next two trips on the Colorado Trail, I mostly relied on the FarOut Guides Colorado Trail Hiking Map and Gaia GPS for backcountry navigation.
Rough Terrain/Scrambling/Rock Climbing
You’ll encounter some rough terrain on the Colorado Trail, but not much that requires intense rock scrambling. Near the top of several climbs, you’ll have to navigate scree and boulder fields, but you don’t need any technical equipment or rock climbing abilities to thru-hike the Colorado Trail. Most of this trail is simply hiking, but it does get steep. As a mountain biker, I found these areas tricky but as a hiker, it's more manageable. Still, any thru-hikers find the Colorado Trail's tread to be less rocky than the Arizona Trail.
Elevation Gain/Elevation Loss
You’ll gain and lose approximately 89,000 feet of elevation over the entirety of the Colorado Trail. Some sections are flatter than others, but be ready to climb on this trail.

The Colorado Trail and the Continental Divide Trail coincide with one another near Old Monarch Pass.
Permits
You don’t need any permits to hike the Colorado Trail. The trail crosses six wilderness areas, where you’ll need to self-register at the trailhead to receive a wilderness permit. Unlike the Continental Divide Trail, the Colorado Trail doesn't go into Rocky Mountain National Park, so you don't have to plan around National Park Service rules and regulations for permits or bear canisters.

The author at the end of the Colorado Trail at Durango after finishing a thru-hike.
Route Summary
You can hike the Colorado Trail from Denver to Durango (southbound or SOBO), or from Durango to Denver (northbound or NOBO). If you look at the Colorado Trail on a map, you may think southbound is actually more “westbound” and northbound is more “eastbound.” And you’re not wrong. In fact, The Colorado Trail Coalition refers to the trail in terms of south and northbound travel, but the FarOut app uses east and west. We’re using southbound and northbound here, but feel free to think of southbound as eastbound and northbound as westbound.
I’ve started in Denver every time I’ve hiked the Colorado Trail. The following route summary follows this more common southbound (or westbound) route.
The trail is divided into 28 segments that start and end at a trailhead or road where you can access the trail. Segment 1 of the Colorado Trail starts in Waterton Canyon, just outside of Denver. The first six miles of Waterton Canyon are along a wide gravel road, used and maintained by Denver Water. Waterton Canyon is a popular day hike and biking destination, so you’ll likely see a lot of people in this section. Waterton Canyon is also home to Bighorn Sheep, so be on the lookout for them as well.
After Waterton Canyon, the trail becomes a steep singletrack path through pine forest. You can now camp anywhere that’s flat enough. At the top of the first climb there is a bench. This spot is known as Lenny’s Rest, and is a great place to take a break.
From Lenny’s Rest, the trail descends to Bear Creek, which is the first good camp spot along the trail. Bear Creek is often flowing, but during dry years you shouldn’t rely on this water source without current beta, especially later in the summer. The FarOut app offers crowdsourced information on the status of water sources.
The trail climbs up from Bear Creek, then descends, then climbs, then descends. This is the rhythm of the Colorado Trail: up, then down, then up again. You’ll reach the high point of the first segment of the trail at mile 13, then the views start to open up as you descend to the South Platte River and the end of the first segment.
Many hikers choose to stop before beginning segment 2 because the next 13 miles of trail cross the Hayman Burn area. There is no water and no trees for shade for this stretch, but the views are expansive, and the early-season wildflowers are spectacular.
After this dry stretch, you’ll get to another road that leads to the small community of Buffalo Creek. There is a fire station 0.1 miles north on the road with a spigot, where you can refill on water though. Be respectful if using this water spigot, and don’t loiter here for long.
You’ll hike through the Buffalo Creek recreation area, a popular mountain biking trail system. The trail through here is smooth and fast. This area also has some active black bears, so be sure to hang your food when camping around here.
The trail then enters the Lost Creek Wilderness, the first of six wilderness areas along the CT. You’ll hike through pine forests and a wide meadow scattered with stands of Aspen trees. After hiking through a large Aspen forest, you’ll arrive at Kenosha Pass on US Highway 285. From Kenosha Pass, you can hitchhike west to the small town of Jefferson, where you can pick up some snacks or get a hot meal.
The trail then climbs to the Continental Divide at Georgia Pass, 11,874 feet. For the next 235 miles, the CT follows the Continental Divide Trail as well. It descends to Gold Hill along Highway 9, where you can resupply in Breckenridge or Frisco. You can catch a ride on the free Summit Stage bus into either town, Frisco is north, and Breckenridge is south.
Next it climbs into the Ten Mile Range, where you’ll hike above 12,000 feet for the first time. You cross a ridge above the treeline, so be sure to watch the sky for oncoming storms. Get used to being above treeline, because the trail is often higher than trees grow from here to the end.
The trail descends to the ski resort town of Copper Mountain, where you can get a restaurant meal or top off on snacks. Copper Mountain is expensive, and the few businesses here close early in the summertime, though. The Summit Stage bus also stops in Copper Mountain, so you can take this to another less expensive town for a full resupply or a night in town.
Hiking past Copper Mountain, you’ll go underneath ski lifts and across ski runs as you climb out of a valley up to Searle Pass. Just before you reach the pass, you’ll see a cabin below the trail. This is Janet’s Cabin, which is available to rent for the night if you plan ahead. After Searle Pass, the trail crosses an alpine meadow to Kokomo Pass.
The trail goes downhill to Camp Hale National Monument, where the 10th Mountain Division stayed in these concrete bunkers to prepare for alpine conditions in Europe during World War II. Next, you’ll reach Tennessee Pass, where you can hitchhike to the town of Leadville.
From Tennessee Pass, the trail stays above 10,000 feet as you pass through the Holy Cross and Mount Massive wilderness areas. You barely skirt across the southern edge of Holy Cross wilderness in forested mountain terrain, but everything to the north of you is massive granite peaks and deep alpine meadows, with Mount of the Holy Cross towering above it all 14,011 feet. In the Mount Massive wilderness area, it’s only a short and steep out-and-back side trail to the summit of Mount Massive, at 14,429 feet.
After Mount Massive, you’ll get to the small village of Twin Lakes. There is a general store in Twin Lakes that accepts hiker resupply boxes, but they’re also stocked with most everything you’d want to resupply.
The Colorado Trail splits after Twin Lakes, so here you’ll have to choose if you want to hike through Collegiate Peaks Wilderness on the Collegiate Peaks East or West route.
I’ve hiked both sides of the Collegiate Peaks, and I recommend the Collegiate West route. The west route is far more scenic, but both routes have a lot of elevation gain and loss. The Collegiate East route passes Mt. Princeton Hot Springs and several 14,000-foot mountains, though. Check out our full guide for hiking both sides of the Collegiate Peaks, or the Collegiate Loop, for more info on this area.
After the Collegiate Peaks, the trail crosses US highway 50, where you can resupply in Salida or Gunnison. On the Collegiate West route, the trail crosses Highway 50 at Monarch Pass, where there is a small gift shop that sells ice cream, hot food, and other snacks.
The two Collegiate Peaks routes rejoin near Marshall Pass Road. There is good camping in this area. This is also a great spot to car camp if you want to see Colorado Trail and Continental Divide Trail thru-hikers. Trail Magic, anyone?
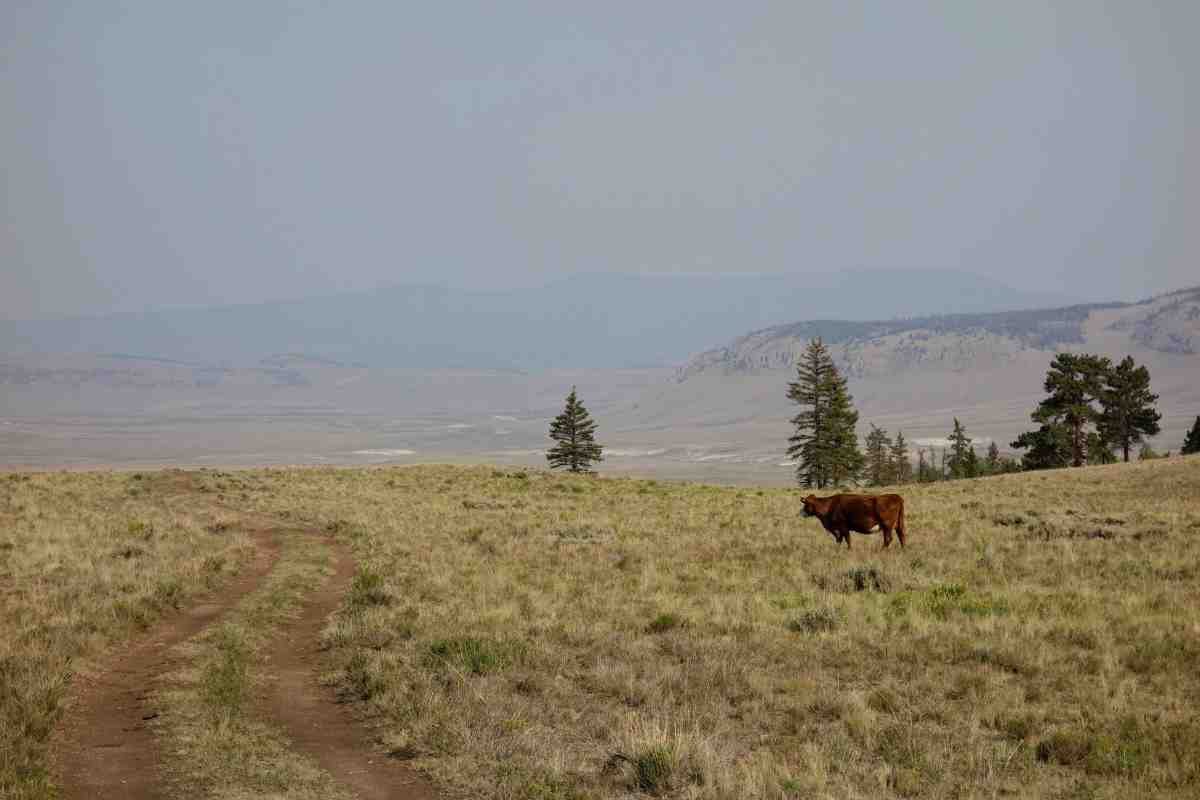
Starting at Marshall Pass, the landscape gets noticeably drier. After walking across the Marshall Mesa, you’ll enter the Cochetopa Hills. This area is high-elevation cattle country, and you’ll likely see herds of grazing cows. Pay attention to water sources and definitely filter any water you collect for the next 50 miles, because there’s not much water until you reach Cochetopa Creek in the La Garita Wilderness. Any water sources in this area you’ll be sharing with all those cows. Less water also means less elevation gain and loss, though. This section goes by quickly.
When you reach Cochetopa Creek, you’ll follow it for several miles across the La Garita Wilderness. When the trail goes away from the creek, you’re almost to San Luis Pass. Just before the pass, you can climb up San Luis Peak, another 14er. A steep and rocky dirt road leads to the town of Creede from San Luis Pass. This is a high-clearance 4x4 road, so you might not see anyone at the San Luis Pass trailhead.
After San Luis Pass, the trail feels mountainous again. You’ll skirt the edge of the La Garita Wilderness for another 15 miles. Here you’ll hike across Snow Mesa, the largest expanse of tundra in the lower 48 states. You won’t be dropping below 12,000 feet until you reach Spring Creek Pass. From Spring Creek Pass, you can get to Lake City to resupply.
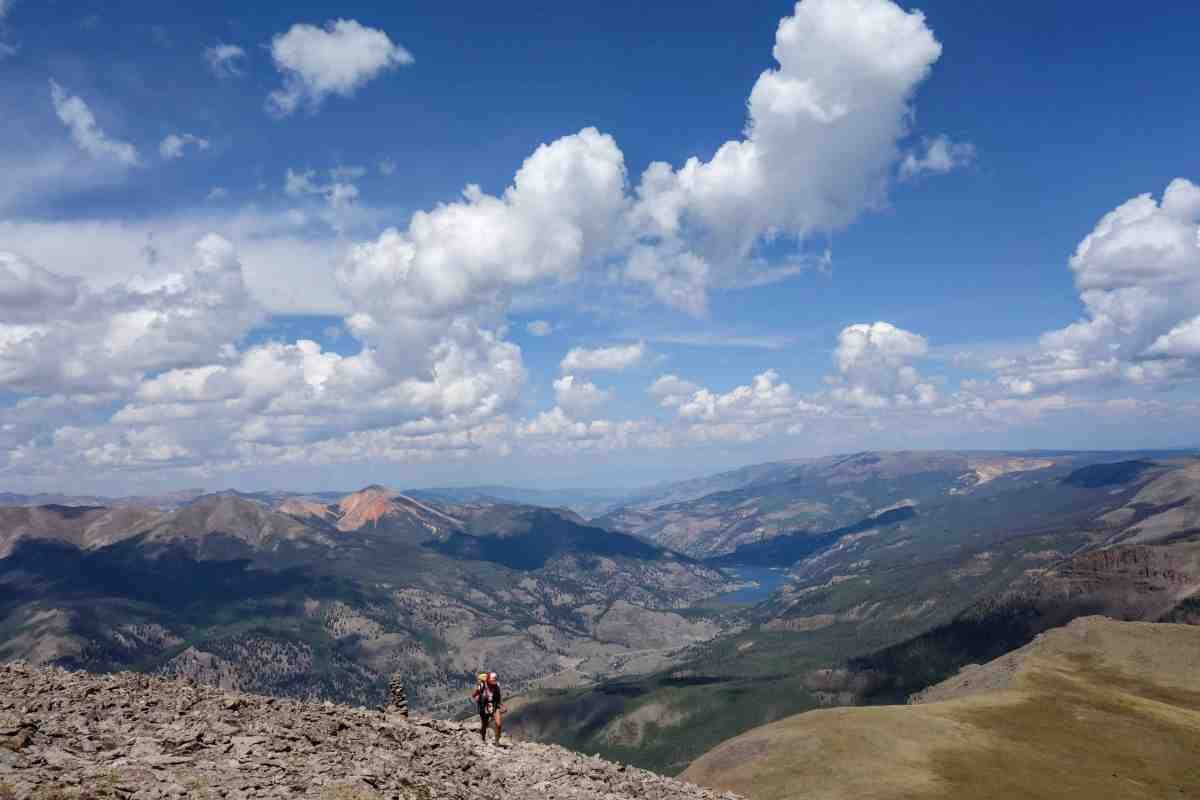
After Spring Creek Pass, you’re in the San Juan Mountains all the way to Durango. The San Juans are many hikers’ favorite section of the Colorado Trail, and rightfully so. They’re big, beautiful, and rugged.
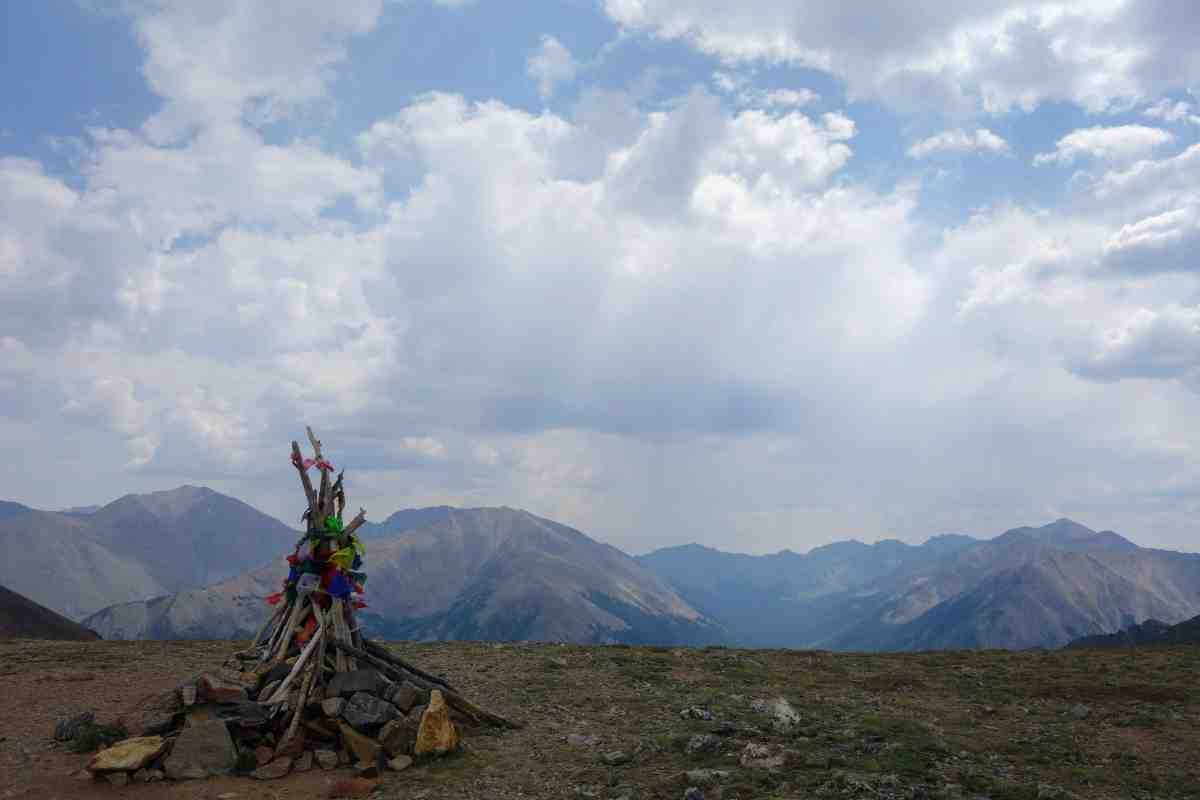
Soon you’ll climb to the Colorado Trail highpoint, at 13,271 feet. The high point is on a large plateau with 360-degree views of the San Juans. Descending off this plateau is one of my favorite views on the entire CT, too.

The epic scenery with substantial portions above 11,000 feet on the Colorado Trail in the San Juans is a highlight of the thru-hike.
At the bottom of a dirt road, you’ll reach Stony Pass Trailhead, another trailhead on a rough 4x4 road. Don’t count on getting a ride from this trailhead because you probably won’t see anyone, no matter how long you wait. I’ve only seen one person here, ever.
You then enter the Weminuche Wilderness in the heart of the San Juans. You’ll hike along the edge of a deep valley to a pass, then across high meadows above 12,000 feet. There are a few active sheep herders in this area, so you might see a flock of sheep grazing in the distance.
The Colorado Trail splits off from the Continental Divide Trail after this. Continuing on the CT, you follow a steep trail downhill for more switchbacks than you can count to the Animas River. After dropping below 9,000 feet for the first time in days, you’ll climb up to Molas Pass, on US Highway 550. Here you can access Silverton, a small mountain town and the last resupply point on the Colorado Trail.
From Molas Pass to Durango, the views are consistently breathtaking. You’ll hike past alpine lakes, through valleys surrounded by towering peaks, and along rocky ridges. When you reach Kennebec Trailhead, on another rough 4x4 road, it’s all downhill to Durango.
There’s another bench on an overlook on the way down. This bench is Gudy’s Rest, named after Gudy Gaskill, the main driving force in the creation of the Colorado Trail. Take a seat on Gudy’s bench and take in one final view of the San Juan Mountains before the final few miles to the Colorado Trail Terminus at Junction Creek Trailhead.

The Colorado Trail is well-marked with posts and markers at junctions. Here, the Colorado Trail and Continental Divide Trail share the same trail, so there are markers for both trails at this junction.
Maps and Guidebooks
Farout
The Farout Guides Colorado Trail Hiking Guide is a very useful mobile app guide for hiking the Colorado Trail. It lists water sources and other important landmarks you should know along the trail. You can leave comments on waypoints and see other hikers’ comments, which is especially helpful for knowing whether or not a water source is flowing.
Gaia
Gaia is my favorite backcountry navigation app. With this app, you can download maps to use when you don’t have a cell signal, create and upload routes from a desktop computer, and much more. There are tons of different map layers you can download that show everything from topography and trails to current snow depth.
Maps
National Geographic makes a Colorado Trail Map Pack, which is useful for planning and navigation.
Guidebooks
The Colorado Trail Databook is a pocket-sized book that you can carry with you while hiking the Colorado Trail. It has information on water sources, campsites, and more.
The Colorado Trail Guidebook is another useful resource for planning your thru-hike, and has a lot of great historic information on the trail. It’s probably not necessary to carry with you while hiking the Colorado Trail. Both the databook and guidebook are put out by Colorado Mountain Club Press.

Camp Hale National Monument along the Colorado Trail is dedicated to the 10th Mountain Division from WWII, who trained at these barracks.
Getting There
Getting to the northern terminus of the Colorado trail at Waterton Canyon Trailhead is logistically easy since it’s situated on the outskirts of Denver. Getting to Durango and the Colorado Trail Trailhead at Junction Creek is logistically more challenging, so most people start the Colorado Trail from Denver.
By Plane
Denver International Airport (DIA) is a large airport you can fly to from most other airports in the United States. You can take the RTD A Line from the airport to downtown Denver, too. You can even take the RTD to the town of Littleton to cut down on Rideshare costs to the trailhead. Durango also has a small airport (Durango-La Plata airport, DRO), but flying in and out of there will be expensive. I’ve flown out of the airport in the nearby town of Cortez (Cortez Municipal Airport, CEZ), which was slightly less expensive than the Durango airport.
By Car
The Waterton Canyon Trailhead is located in Littleton, Colorado. It’s only a 30-minute drive from downtown Denver.
The Junction Creek Trailhead is located in Durango, Colorado. Most Colorado Trail hikers who finish here have no issue catching a ride from this popular trailhead into town. Also, hikers who start here won’t have an issue getting a ride via a taxi or rideshare app.
Bus and Shuttle Services
You can ride public transit within a few miles of the Waterton Canyon Trailhead. Take the Denver RTD Light Rail D Line to the Littleton/Mineral Station. The Littleton/Mineral light rail station is only 9 miles from Waterton Canyon Trailhead.

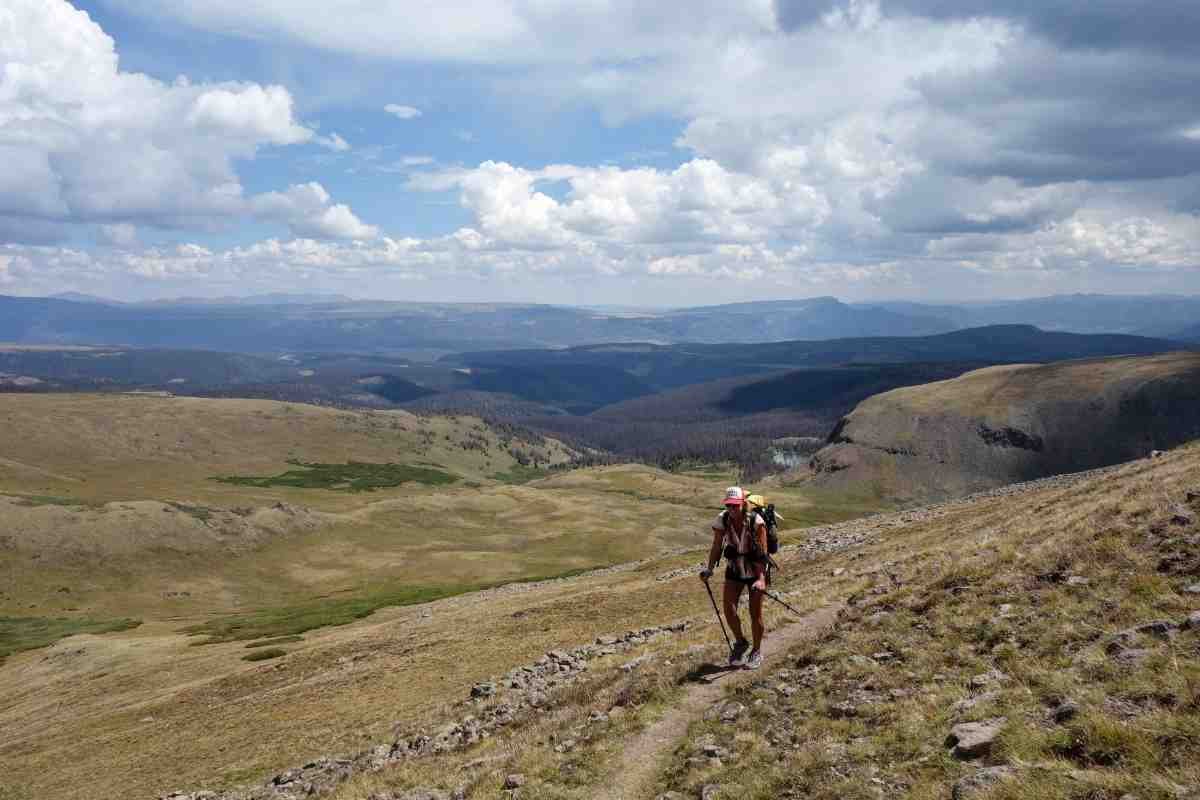
One of many long stretches above treeline on the Colorado Trail.
Trailheads
The Colorado Trail starts at Waterton Canyon Trailhead, just outside of Denver, Colorado. It ends at the Junction Creek Trailhead in Durango, Colorado.
Post Trip Favorite Restaurant
Carver Brewing Company in Durango gives a free pint of their Colorado Trail Nut Brown Ale to everyone who finishes the trail. I drank one plus a couple more pints and had some good food here after I finished the CT.
Durango is also home to Ska Brewing, another great Colorado brewery. I also recommend eating at the Durango Diner, where you can have a huge breakfast and hang out with the Durango locals.

One of many alpine lake views along the Colorado Trail.
Regulations
Follow Leave No Trace Ethics
Dogs are allowed on most of the Colorado Trail, except for in Waterton Canyon. There is an alternate starting point at the Indian Creek Trailhead for hiking the CT with a dog.
Only camp in established sites along the Colorado Trail.
Group size must be limited to 15 people or fewer.

The author on the Colorado Trail in ski country, where there are many mountain towns to resupply, grab a shower, or spend a night at a hotel or hostel.
Resupply
I recommend resupplying in Breckenridge or Frisco, Twin Lakes, Leadville, Salida, Lake City, and Silverton on the Colorado Trail. These towns are all relatively easy to get to and are spaced so you never have to carry food for more than 100 miles. All these towns have a full-sized grocery store or well-stocked general store that caters to thru-hikers.
If you have specific dietary needs, you should consider sending a resupply box to Twin Lakes, Lake City, and Silverton. The stores in these towns don’t have as big of a selection as the larger grocery stores along the Colorado trail.
You can stop in Jefferson and Copper Mountain for snacks and hot food. I’ve also resupplied in Creede, but getting back to the trailhead at the end of a 5-mile dead-end dirt road is difficult.

The author’s camp on the Colorado Trail.
Camping
You can camp in most areas along the Colorado Trail. Be sure to camp at least 200 feet from water sources and the trail when possible.
You can’t camp for the four miles west of Highway 91, on the Copper Mountain resort property. There is also a small area on the Collegiate West route that’s closed to camping for the endangered Boreal Toad. Other than those areas, you can camp almost everywhere along the trail.

The Colorado Trail tends to have less water at higher elevations, so water planning is important.
Water Planning
There is plenty of water in most sections of the Colorado Trail. Plan for less water at the beginning of segment 2, in the Hayman Burn area, as well as from Marshall Mesa to the Cochetopa Hills. There’s also a longer, 15-mile water carry, north of Taylor Lake between Silverton and Durango, that often catches me by surprise.
In general, there is less water at high elevations than you might expect. So pay attention to upcoming water sources. This is particularly true in the San Juans, on the furthest south and west segments. That tiny trickle might end up being the only water along the trail for miles.

A marmot on the Colorado Trail.
Bears and Food Storage
I carried an Ursack for storing my food on the Colorado Trail. For other bear canister recommendations, see REI’s Food Storage story or REI’s Bear Canister story.

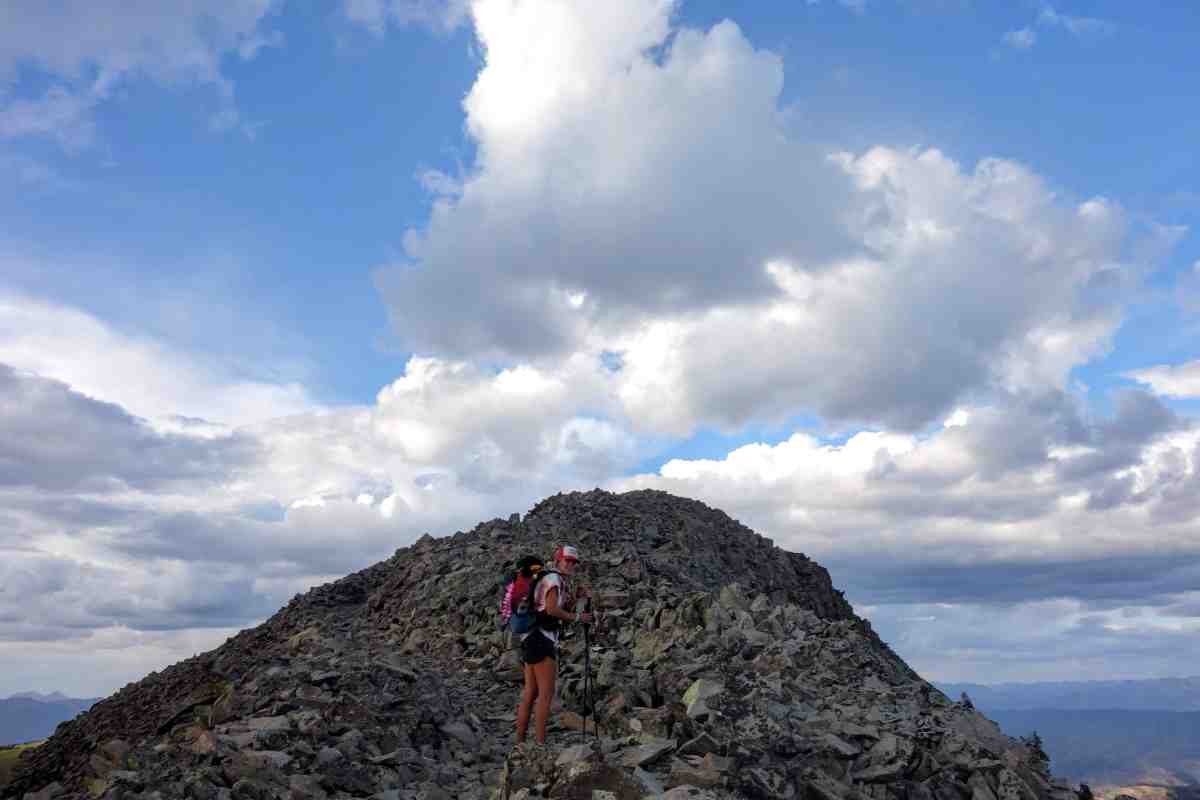
The Colorado Trail has numerous options for side-trips up Colorado 14ers (14,000 or more foot peaks). Often, you can take established trail up to the summit right from the Colorado Trail.
Side Trips
There are many side trips you can take along the Colorado Trail, including several prominent 14ers. Mount Massive, Mount Elbert (the highest peak in Colorado and just 65 feet shorter than Mount Whitney), and San Luis Peak are all relatively easy side trips to the top of 14,000-foot peaks along the Colorado Trail.
If you take the Collegiate East route, you can take a lot more side trips to prominent 14ers in the Collegiate Range, too: Mount Oxford/Belford, Mount Harvard/Mt. Columbia, Mount Yale, Mount Princeton, Mount Antero, and Mount Shavano/Tabeguache. Mt. Princeton Hot Springs is also situated along the trail on the Collegiate East route.

The author at Kokomo Pass (12,022 feet) on the Colorado Trail.
Variations
The Collegiate Peaks East route is technically the official Colorado Trail route. The main variation along the Colorado Trail is the Collegiate West route. For more information on the Collegiate East and West routes, check out our Collegiate Peaks Loop backpacking guide.

The author at Lenny’s Rest on the Colorado Trail.
Gear Rentals
Wilderness Exchange in Denver rents outdoor gear.

View of the mountains from the Colorado Trail.
Gear List
TENT
I used the Tarptent Aeon Li Tent on this trip because it’s a lightweight tent that does well in windy conditions and has a fully-enclosed bug net.
See our Best Backpacking Tents guide for more recommendations.
BACKPACK
I used an MYOG (make your own gear) 30-liter frameless backpacking pack on this trip because I never carried more than 3-4 days of food. I also use an Outdoor Vitals CS40 backpack for trips where I need to carry more than 4 days' worth of food at a time.
See our Best Backpacking Backpacks guide for more recommendations.
SLEEPING BAG
I used a Cedar Ridge Outdoors Leconte 20* quilt (now discontinued). It’s a high-quality down quilt that has reliably kept me warm for thousands of trail miles. If you're interested in a dedicated sleeping bag instead of a quilt, see our Best Backpacking Sleeping Bags guide.
SLEEPING PAD
I used a Therm-a-Rest NeoAir XLite for this trail. It’s reliable, keeps me warm, and Therm-a-Rest’s lifetime warranty is no joke. The Therm-a-Rest NeoAir XLite NXT is our overall winner in our Best Backpacking Sleeping Pads guide.
TREKKING POLES
I used Paria Tri-fold Carbon Cork trekking poles on this trip because they’re inexpensive, lightweight, and fold to a small size when I’m not using them.
For more recommendations, see our Best Trekking poles story.
COOKING SYSTEM
MSR Pocket Rocket 2 stove, which is the overall winner in our Best Backpacking Stoves guide
See our Best Backpacking Stoves story for more recommendations.
COOKING POT
I used a Toaks 750 mL pot, which is the overall winner in our Best Backpacking Cookpot guide.
See our Best Cooking Pot section for other cookpot recommendations.
HEADLAMP
I carried a Petzl Bindi Headlamp, which is affordable, bright, and lightweight.
See our recommendations in our Best Headlamps story.
Satellite Messenger
Cell reception is not always guaranteed on the Colorado Trail. I carried the Garmin InReach Mini because it allows you to send and receive messages from anywhere, including contact search and rescue. The InReach Mini 2 is the overall winner in our Best Personal Locator Beacon and Satellite Messenger guide.
FOOD STORAGE
I carried an Ursack for storing my food on the Colorado Trail.
WATER PURIFIER
I carried the Sawyer Squeeze, which is the overall winner in our Best Water Filters and Purifiers guide.
Pocket Knife
I carried a Classic Mini Swiss Army Knife on this trip.
Map and Compass
I carried the Colorado Trail Databook and a smartphone for maps on this trip.
First Aid Kit
4 squares of gauze
Antibiotic ointment
Alcohol wipes
2 large square adhesive bandages
Ibuprofen
Sun Protection
Trucker hat
Sunscreen - see our Best Face Sunscreen and Best Sunscreen for your Body guide for our recommendations

The author wearing a sun hoodie, trail running shorts, hiking socks, and hiking shoes on the Colorado Trail.
What to wear
SHOES OR BOOTS
I used the Hoka Speedgoat on this trip because they’re well-cushioned, durable, and stable.
For more recommendations, see my single-product review of the Hoka Speedgoat 5 or my Best Men's Trail Running Shoes guide or our Best Women's Trail Running Shoes story.
If you’d feel more comfortable in boots, check out our Best Hiking Boots story or our Best Lightweight Hiking Boots story.
A nice footwear compromise for this trip would’ve been hiking shoes, which are designed to feel like a trail runner but have stability more like a boot. See our Best Hiking Shoes story for footwear that has more durability and stability than trail runners.
RAIN JACKET
I brought an Ultimate Direction Ultra Rain Jacket (men's and women's) for this trip. See our gear review of the Best Lightweight Rain Jackets for other recommendations.
RAIN PANTS
I carried the Ultimate Direction Ultra Pants (men's and women's) because they’re lightweight and have zips at the ankles to put on and take off with shoes on.
DOWN OR SYNTHETIC JACKET
I used the Mountain Hardwear Ghost Whisperer (men's and women's) down hoody for an insulated jacket because it’s incredibly lightweight and warm.
The Ghost Whisperer is our winner for Best Ultralight down jacket in our Best Down Jackets guide. If you prefer something warm when wet or vegan-friendly, check out our Best Synthetic Insulated Jackets article.
FLEECE OR MIDLAYER
I carried an MYOG Polartec Alpha Direct Hoody for a four-ounce mid-layer that’s warm and breathable. For similar models also made of Alpha Direct, see Senchi Designs or FarPointe Outdoor Gear. You can also get a pattern for making your own Alpha Direct Hoody at Ripstop by the Roll. They recommend using Polartec® Alpha Direct 4004, Polartec® Alpha Direct 4008, or Polartec® Alpha® Direct with Wool 4048.
SUN SHIRT
I used a Free Fly Bamboo Lightweight Hoodie (men's and women's) on this trip because it’s a bamboo fabric, which doesn’t get too hot and doesn’t stink like polyester.
See our Best Sunshirts guide for more recommendations.
HIKING PANTS
I didn’t carry hiking pants on this trip because I prefer to hike in running short
See our guides to the Best Women's Hiking Pants and Best Men's Hiking Pants for more recommendations.
SHORTS
I used the Patagonia Strider Pro Shorts (men's and women's) on this trip because they have lots of pockets. Patagonia also has some of the best environmental practices of any company.
The Strider Pro is the overall winner for best trail running shorts in both our men's and women's guides. For more recommendations, see our Best Men's Trail Running Shorts guide, Best Women's Trail Running Shorts guide, Best Men's Hiking Shorts guide, or Best Thru-hiking Shorts guide.
BASELAYER
I carried the Patagonia Capilene Base Layer Bottoms (men's and women's) because they’re lightweight and comfortable. For more recommendations, see our Best Base Layers guide.
HIKING SOCKS
I wore Darn Tough Hiking Socks (men's and women's) because they’re extremely durable. They're the overall winner in our Best Hiking Socks guide, which also has more recommendations.
WARM HAT
I carried an MYOG Polartec Alpha Direct warm hat because it’s extremely lightweight. Since I carried a hooded down jacket and hooded alpha mid-layer, I didn’t need a very warm hat. You can find a similar hat by FarPointe Gear.
SUN HAT
I wore a BOCO Gear Technical Trucker Hat because it’s comfortable, looks good, and fits under the hood of my sun hoody. Check out our Best Sun Hats guide for more recommendations.
GLOVES OR MITTENS
I carried the Rab Power Stretch Contact Gloves because they’re lightweight and warm. For more recommendations on lightweight but warm gloves, see our Best Winter Gloves guide.


